 Viflos
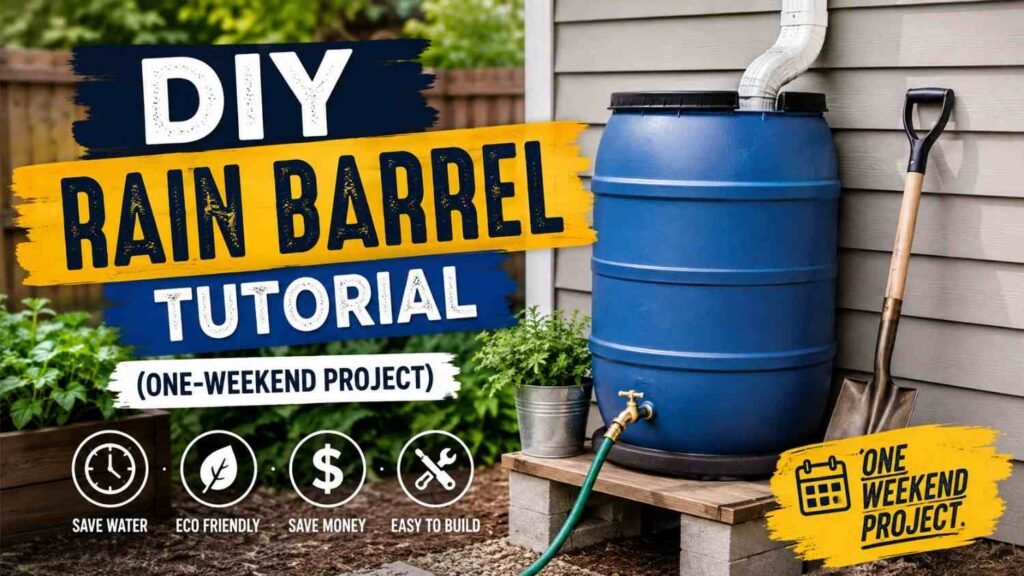
You can build a working DIY rain barrel in a single weekend for around sixty to ninety dollars: a food-grade 55-gallon drum, a spigot and bulkhead kit, a downspout diverter, and basic hand tools are all it takes. Saturday covers the barrel itself (cutting holes, installing the spigot, fitting a mosquito screen); Sunday covers the stand and hooking it up to your downspout.
This guide walks through the whole build the way I’d explain it to a neighbor standing in my driveway, including the mistakes that are easy to make the first time around, like drilling the overflow hole too low or skipping the screen and regretting it by July.
Lawn and garden watering makes up close to 40 percent of total household water use during summer months, and a good chunk of that is water your municipal system already treated to drinking standards before it ever touched your grass. A rain barrel intercepts water that would otherwise run off your roof into the storm drain and puts it to work instead, cutting your outdoor water use without any change to your actual watering habits. It also gives you a backup supply during watering restrictions in a lot of areas, since most drought ordinances target municipal tap water specifically and don’t touch water you’ve already collected and stored yourself.
A single rain barrel saves most homeowners roughly this much water during peak summer months, according to the EPA.
What You’ll Need
- One food-grade 55-gallon plastic drum with a removable or gasketed lid
- Brass or heavy plastic spigot with a matching bulkhead fitting (usually sold as a kit)
- Downspout diverter kit (the plastic or aluminum flow-splitter type, not just a cut elbow)
- Fine fiberglass or aluminum window screen, roughly 24 by 24 inches
- Roll of plumber’s Teflon tape
- Tube of exterior-grade silicone caulk
- Eight to twelve standard cinder blocks, or enough pressure-treated 4×4 lumber to build a low platform
- A short length of flexible vinyl or PVC pipe for the overflow, about 3 to 4 feet
- Zip ties or hose clamps
Choosing the Right Barrel
Not every 55-gallon drum belongs under your downspout. The barrel you want is stamped somewhere near the bottom with a recycling code of 2 (HDPE) and, ideally, “food grade” or a note about its former contents. Barrels that held olive brine, syrup, juice concentrate, or pickling liquid are common on the used market and are the safest bet, since the plastic never absorbed anything that would leach into water your tomatoes are drinking from. Steer clear of drums that held pesticides, fuel additives, or industrial solvents, even if someone insists they rinsed them out. There is no rinse that fully undoes what porous plastic soaks up over months of storage.
Craigslist, Facebook Marketplace, and local bottling or food-processing plants are the usual sources, and a clean used drum typically runs fifteen to thirty dollars. Home improvement stores and garden centers also sell purpose-made rain barrels new, sometimes already fitted with a spigot and screen, for sixty to a hundred and twenty dollars if you’d rather skip the drilling entirely. If you go that route, you can jump straight to the stand-building section below.
Size matters less than people expect. A 55-gallon barrel is the standard because it is what most surplus food-grade drums come in, not because it’s some ideal capacity. If your roof is large or you get frequent heavy storms, you will fill one barrel faster than you’d think. A single roof panel feeding one downspout during a half-inch rain can shed well over 100 gallons, so plan on adding a second linked barrel down the road rather than assuming one will cover a whole growing season.
Color is worth a passing thought too, mostly for algae control rather than looks. A translucent or light-colored barrel lets sunlight reach the water inside, and sunlight plus standing water plus nutrients from roof runoff is exactly what algae needs to bloom into a slimy green film along the inside walls. Dark blue, black, or opaque barrels block that light and stay clearer for longer with the same amount of maintenance. If the only drum you can find is a light or translucent one, a coat of exterior paint on the outside (see the painting section below) doubles as algae prevention, not just decoration.
Standard 55-gallon drums aren’t the only option, and it’s worth knowing the alternatives even if you end up going with the classic drum. Repurposed food-grade totes in the 30 to 35-gallon range work for smaller roofs or tight side yards where a full drum won’t fit, though the smaller capacity means you’ll fill and empty it more often. On the larger end, IBC totes (the boxy 275-gallon plastic containers you sometimes see used for farm chemicals or bulk liquids) can be converted into a rain collection system, but they weigh well over a ton when full and need a genuinely engineered base, usually a poured concrete pad rather than stacked cinder blocks, so they’re a different project entirely rather than a weekend build.
Trash-can style plastic barrels, the kind sold at hardware stores specifically as rain barrels, are usually pre-drilled and come with the spigot already installed, trading some of the DIY satisfaction for convenience. If your goal is genuinely to build this yourself and understand every seal in the system, a plain used drum and this tutorial gets you there for less money. If your goal is just to have working rain collection by this weekend with minimal tool use, a pre-made barrel with a diverter kit added is a legitimate shortcut, and nothing in this guide changes for the diverter and stand portions either way.
Budget Breakdown: What This Project Really Costs
Rain barrel tutorials online tend to throw out a vague “under a hundred dollars” figure without showing where the money actually goes, so here’s a realistic breakdown based on buying a used food-grade drum rather than a new pre-made barrel.
| Item | Typical Cost | Notes |
|---|---|---|
| Used food-grade 55-gallon drum | $15 to $30 | Craigslist or Facebook Marketplace, often listed as “olive drums” or “syrup drums” |
| Spigot and bulkhead fitting kit | $10 to $18 | Sold together as a rain barrel kit at most hardware stores |
| Downspout diverter kit | $15 to $35 | Price scales with brand and whether it includes a winter bypass lever |
| Mesh screen, Teflon tape, caulk | $8 to $12 | You’ll have leftover screen and tape for future projects |
| Cinder blocks (8 to 12) or lumber for stand | $15 to $40 | Cinder blocks are cheaper; lumber looks more finished |
All told, most people land somewhere between sixty and a hundred and thirty-five dollars depending on whether they build the stand from blocks or lumber and whether they already own the basic tools. Buying a new, pre-assembled rain barrel from a garden center skips most of the labor here but usually runs sixty to a hundred and twenty dollars on its own, before a diverter or stand, so building it yourself is close to a wash on materials with the added benefit of knowing exactly how every seal was installed.
Tools and Materials Checklist
Beyond the supplies listed above, you’ll want a power drill with a 1/2-inch and a 2 1/8-inch hole saw bit, a jigsaw for cutting the inlet opening in the lid, an adjustable wrench for tightening the bulkhead fitting, a level, and a tape measure. A permanent marker and a scrap of cardboard for tracing your diverter’s outline against the lid will save you from eyeballing an odd-shaped cut freehand.
If your barrel arrived with visible residue or a faint smell, wash it out first with a mixture of warm water and a few tablespoons of dish soap, swirl it around, dump it, and rinse twice. Let it air dry upside down for a few hours before you start cutting; wet plastic shavings from a hole saw are far messier to deal with than dry ones.
One thing worth buying even though it feels optional: a tube of silicone caulk. Every fitting you thread into the barrel wall, no matter how well you wrap the threads in Teflon tape, benefits from a bead of caulk around the outside edge once it’s tightened. It’s the difference between a barrel that’s merely functional and one that doesn’t weep a slow drip down the side of your stand for the next three summers.
Where to Place Your Barrel
The best spot is directly under an existing downspout on the side of the house that gets the most consistent gutter flow, which for most homes is whichever side collects the largest single roof section. Walk your gutters after the next rain and notice which downspout is actually gushing versus just trickling; that’s usually a better indicator than guessing from roof size alone, since roof pitch and gutter slope change how water actually distributes.
Give yourself at least a foot of clearance on the spigot side so you can comfortably fit a watering can or hose end underneath once the stand is in place. If you’re planning to run a soaker hose or drip line off the barrel to a nearby garden bed, placing the barrel on the side of the house closest to that bed saves you from running fifty feet of hose across the yard every time you want to water.
Keep it at least a few feet from your home’s foundation if the overflow will be draining onto open ground, and check that the spot isn’t in a low point of your yard that already collects standing water after a storm; stacking a rain barrel on top of an already-soggy area just adds a second saturation source right next to your house. If your downspout empties onto a splash block or into an underground drain line, you’ll need to temporarily relocate or cap that when you install the diverter.
Step-by-Step Build
-
Clean and dry the barrel
Wash the inside with dish soap and water, rinse twice, and set it upside down to drain for a few hours. Any leftover residue on the inner wall near where you’ll cut can gum up the hole saw and make for a rougher edge.
-
Mark the spigot location
Set the bulkhead fitting against the barrel about 3 to 4 inches up from the bottom, on whichever face will be easiest to reach with a watering can or hose once the barrel is on its stand. Trace the outer edge of the fitting’s base with a marker. Keeping the hole a few inches off the true bottom leaves room for sediment to settle below the spigot line instead of clogging it.
-
Cut the bulkhead hole
Drill a pilot hole inside your tracing, then switch to the hole saw sized to match your bulkhead fitting’s threaded body, usually somewhere between 3/4 inch and 1 1/4 inch depending on the kit. Go slowly. Plastic drums grab and chatter more than wood does, and rushing this cut is the easiest way to end up with a ragged, oversized hole that never seals properly.
-
Install the bulkhead fitting and spigot
Wrap the threads of the bulkhead fitting in three or four wraps of Teflon tape, insert it through the hole from the inside, and thread the locking nut on from the outside. Hand-tighten first, then snug it another quarter turn with a wrench, being careful not to overtighten and crack the plastic around the hole. Wrap the spigot’s threads the same way and screw it into the bulkhead fitting. Run a bead of silicone caulk around the outside seam once everything is tight.
-
Cut the overflow hole
Measure down about 3 inches from the top rim of the barrel, on the side opposite the spigot, and mark a spot for a second hole using the same hole saw process. This is where excess water escapes once the barrel is full, so it needs to sit below the lid line but well above the spigot. Thread in a second small bulkhead fitting or simply push-fit a short length of vinyl tubing through the hole and seal around it with caulk, angled to drain away from your house foundation.
-
Trace and cut the inlet opening in the lid
Hold your downspout diverter’s flexible hose against the barrel lid where it will naturally hang once the diverter is mounted on the downspout above. Trace around it, and cut the opening with a jigsaw. Cut it slightly smaller than the hose diameter so the fit is snug rather than loose, which matters in the next step.
-
Fit the mosquito screen
Cut a piece of fine mesh screen a couple of inches larger than the lid’s inlet opening in every direction. Lay it over the opening from the underside of the lid (or the top, depending on your barrel’s lid style) and secure the edges with a bead of caulk or a ring of duct tape, then snap the lid back into place. The screen should sit taut, not sagging into the barrel, so water passes through freely but nothing bigger than a gnat gets past it.
-
Dry-fit everything before final assembly
Set the lid on, check that the spigot and overflow fittings line up the way you expect relative to where the barrel will sit on its stand, and confirm nothing is cross-threaded or leaning. This is the point to catch a mistake, before the barrel is sitting on a stand under a downspout with rain in the forecast.
-
Test the seals with a hose
Before you trust the barrel to actual weather, set it on its stand, connect a garden hose to run water through the diverter for three or four minutes, and watch every seam: the bulkhead fitting, the spigot threads, the overflow, and the lid edge. A slow drip at this stage is normal for the first minute as the fitting seats itself, but a steady stream means something needs another wrap of Teflon tape or a fresh bead of caulk. It’s a five-minute check that saves you from discovering a leak during the first real storm, usually at night, usually while you’re not home.
Building a Stable Stand
A full 55-gallon barrel weighs somewhere between 400 and 450 pounds, so the stand underneath it is not a decorative detail, it’s structural. Two options work well for a weekend build. The simplest is stacking cinder blocks two or three courses high (roughly 12 to 18 inches total), laid flat and staggered like brickwork rather than stacked in a single unstable column. The second is a basic frame built from pressure-treated 4×4 posts and 2×6 decking boards, which looks a little more finished if the barrel will sit somewhere visible.
Whichever you choose, elevation isn’t just cosmetic. Raising the barrel 12 to 18 inches off the ground gives you enough gravity-fed pressure to fill a watering can from the spigot without it dribbling out at a frustrating trickle, and it gives you the clearance to actually get a can or hose end underneath the spigot in the first place.
Check the ground with a level before you set the first block or post, in both directions, not just one. Even a slight lean becomes a real problem once 400-plus pounds of water is sitting on top of it, and a barrel that’s tilted even a few degrees puts uneven stress on the bulkhead fitting and the spigot threads, which is where slow leaks tend to start. If the ground under your downspout slopes, it’s worth digging out a shallow level pad rather than trying to shim the stand with scrap wood.
Mosquito-Proofing and Debris Control
Standing water and mosquitoes go together, and a rain barrel is exactly the kind of still, sheltered water a female mosquito is looking for to lay eggs. The good news is that a properly screened barrel is essentially mosquito-proof, since the insects only need a gap the width of a pencil to get in, and a taut mesh screen over every opening closes that gap completely.
Beyond the inlet screen you installed in Step 7, double-check the overflow outlet too. It’s an easy spot to forget, and an unscreened overflow hose is a wide-open door. If you ever notice small wriggling larvae near the water’s surface (they look like tiny commas twitching just under the surface), a few drops of vegetable or mineral oil will suffocate them by cutting off their air supply, or you can drop in a mosquito dunk, a small doughnut-shaped tablet containing Bti bacteria that’s harmless to plants, pets, and people but lethal to mosquito larvae specifically.
Leaf and debris buildup is the other half of this problem. A gutter guard upstream of your downspout diverter cuts down dramatically on what makes it to the barrel in the first place, and it’s worth the extra twenty or thirty dollars if your roof sheds a lot of leaves. Even with a guard, plan to pop the lid and rinse the screen out with a hose two or three times a season, especially right after the trees nearby drop their spring pollen or their fall leaves, since that’s when the screen clogs fastest and water starts backing up over the top instead of draining through.
Using Rain Barrel Water Safely in the Garden
Rain barrel water is what gardeners call “soft water,” meaning it hasn’t passed through a municipal treatment system and carries none of the chlorine or added minerals that tap water does. Most ornamental and vegetable plants actually do better with it than with treated tap water, since chlorine and fluoride can build up in soil over a growing season and affect certain sensitive species like azaleas, blueberries, and ferns.
The caveat is that this water is not treated to drinking standards and shouldn’t be used on the parts of edible plants you’ll eat raw without rinsing first, and it should never be consumed directly by people or pets. Roof runoff can carry trace amounts of whatever settled on your shingles between storms: bird droppings, dust, pollen, and small amounts of whatever your roofing material sheds over time. For watering the soil around vegetables, herbs, and ornamentals, this is a non-issue. For direct application to leafy greens close to harvest, give the plant a rinse with clean water before eating, the same precaution you’d take with any garden produce regardless of the water source.
If your area gets long dry stretches, a full barrel is roughly enough to hand-water a mid-sized vegetable garden for a week to ten days, depending on bed size and how hot it’s been. Attaching a simple gravity-fed soaker hose or drip line to the spigot stretches that further, since drip irrigation uses a fraction of the water that overhead watering does and delivers it straight to the root zone instead of losing a portion to evaporation.
Painting and Customizing Your Barrel
A plain black or blue plastic drum works fine functionally, but if the barrel is going somewhere visible, painting it is a straightforward Saturday-afternoon add-on. Start by washing the outside with a mix of water and a little vinegar to cut through any grime, then rough up the surface lightly with fine-grit sandpaper so primer has something to grip. Plastic sheds paint that goes on smooth and glossy, so this step matters more than it seems like it should.
Use a primer formulated for plastic, then two light coats of exterior latex or an outdoor spray paint made for plastic surfaces, letting each coat dry fully before the next. Stencils, painter’s tape for stripes, or a simple house-number-and-vine motif are common choices for a barrel that’s going to sit near a front walkway rather than tucked behind a garage. Whatever design you choose, avoid painting directly over the spigot, overflow fitting, or lid seam, since paint buildup there can interfere with a clean seal down the line.
Is Rainwater Harvesting Legal Where You Live?
Rainwater collection is legal in all 50 states, and the overwhelming majority of them place no restrictions at all on a residential rain barrel. The confusion mostly comes from a handful of Western states that historically treated all precipitation as part of the downstream water supply under prior appropriation law, rules that have loosened considerably in the last decade. Colorado, once the strictest state on this, now caps household collection at 110 gallons across no more than two containers, which a single rain barrel setup falls comfortably under. Utah allows much larger systems but requires registration once you go above 2,500 gallons of total storage, well beyond what a weekend rain barrel project involves.
States like Texas, Arizona, and California go the opposite direction and actively encourage rainwater harvesting through tax incentives and, in Texas’s case, a law that prevents homeowners associations from banning collection systems outright. If your property is in an HOA community, it’s still worth a quick look at your HOA’s covenants, since some restrict what can be visible in a front or side yard regardless of state law, which is more of an aesthetics rule than a water-rights one.
For a basic one or two-barrel setup like the one in this tutorial, you’re very unlikely to run into any legal friction anywhere in the country. If you’re planning to scale up to a multi-barrel system storing several hundred gallons, a quick call to your county building department before you start is worth the ten minutes it takes.
Scaling Up: Linking Multiple Barrels
Once the first barrel is running, a lot of people find themselves wishing they’d built two from the start, especially anyone gardening in a region with real summer heat. Linking a second barrel to the first is a smaller project than the original build, usually an hour or so, and it roughly doubles your storage without needing a second downspout or diverter.
Drill a linking hole a few inches up from the bottom on the side of each barrel that will face the other, in the same style as the bulkhead hole from Step 2. Connect the two holes with a short length of tubing and a bulkhead fitting on each end, sealed the same way as the original spigot. Because both barrels share that connection near the bottom, they fill and drain together and stay at the same water level automatically, similar to how a pair of connected fish tanks equalize without any pump or valve needed.
Position the second barrel right next to the first rather than stacking or elevating it differently, since the linking connection assumes both barrels sit at roughly the same height. Beyond two barrels, the same linking method scales to three or four in a row, though at that point it’s worth also adding a second overflow route, since one small overflow hole on the last barrel in the chain has to handle the runoff for the whole system during a heavy storm.
Maintenance and Winterizing
A rain barrel is low-maintenance but not zero-maintenance. Check the screen for tears or sag every few weeks during the growing season, and give the inside a rinse if you notice sediment building up around the spigot, which slows the flow over time. If the water ever develops an odd smell (not just an earthy mineral smell, which is normal, but something sharper), it’s usually a sign of stagnant water sitting too long without being drawn down, and a full drain-and-refresh solves it.
Winterizing matters most in any climate that sees hard freezes. Water expands as it freezes, and a barrel full of ice can crack the plastic or blow out a fitting, ruining a build that took you a weekend to get right. Before the first hard freeze, disconnect the diverter hose from the downspout (most diverter kits have a simple lever or cap for exactly this), open the spigot fully to drain the barrel completely, and either store it empty in a garage or shed, or leave it outside on its stand tipped slightly so no water can pool inside over winter. Reconnect the diverter and you’re back in business the following spring.
Common Mistakes to Avoid
The overflow hole is the single most skipped step, and it’s the one that causes the most damage when it’s missing. Without it, a barrel that fills during a heavy storm has nowhere for the excess water to go except back up the downspout or over the lid, right next to your foundation. Always cut it, and always angle the discharge away from the house.
Overtightening the bulkhead fitting is the second common mistake. The plastic around that hole is under real stress once the barrel is full, and cranking the locking nut down hard “to be safe” is more likely to crack the barrel wall than to improve the seal. Hand-tight plus a quarter turn, backed up with a bead of caulk, holds up better than brute force.
Skipping the mosquito screen because “I’ll add it later” is the third. Once a barrel has been sitting open for even a week or two during warm weather, there’s a real chance mosquitoes have already found it, and by the time you notice the problem, you’re dealing with active larvae rather than prevention.
Placing the barrel on unlevel or unstable ground is the fourth, and it’s the one that shows up slowly rather than immediately. A stand that’s slightly off level might hold fine for the first few rains, but months of a 400-pound load sitting at even a small angle puts constant uneven pressure on the fittings, and that’s usually what finally gives way, not the fittings themselves. Take the extra fifteen minutes to get the base genuinely level before you set the barrel on it.
Using a diverter that’s just a cut piece of downspout instead of an actual diverter kit is the fifth. It technically routes water into the barrel, but it gives you no way to bypass the barrel once it’s full or during winter, which means overflow water has nowhere to go but over the top, and you lose the ability to disconnect cleanly before a freeze. A real diverter kit costs fifteen to thirty-five dollars more but earns that back the first time you need to shut it off in a hurry.
Frequently Asked Questions
How long does it actually take to build a DIY rain barrel?
The barrel itself, cutting the holes, installing the spigot, and fitting the screen, takes about two to three hours for a first-timer. Building a stand and connecting a downspout diverter adds another two to three hours, which is why this is usually split across a Saturday and Sunday rather than rushed into one sitting.
Is rainwater harvesting legal where I live?
Yes, in all 50 states as of 2026. Most states have no volume restrictions at all on residential rain barrels, though Colorado caps household collection at 110 gallons across no more than two containers and Utah requires registration above 2,500 gallons. Check your county building department if you plan to add barrels beyond a basic one or two-barrel setup.
Does the barrel really need to be food-grade?
Yes. Food-grade plastic, usually stamped with a recycling code of 2 or 7 and an HDPE marking, has not held anything toxic and does not leach chemicals the way a barrel that stored pesticides, solvents, or industrial chemicals might. Since rain barrel water often ends up on edible plants, this matters even though you’re not drinking it directly.
How do I keep mosquitoes out of a rain barrel?
Cover every opening with fine mesh screen, including the inlet and the overflow, since mosquitoes only need a gap the width of a pencil to get in and lay eggs. A tight-fitting lid with no exposed water surface is the single biggest factor. If you ever see larvae wriggling near the surface, a few drops of vegetable oil or a mosquito dunk will kill them without harming plants.
How much water can one rain barrel actually save?
A single 55-gallon rain barrel saves the average homeowner around 1,300 gallons of water during peak summer months, according to the EPA. Since a typical roof can shed hundreds of gallons in one moderate storm, most people find their barrel fills faster than expected and quickly wish they’d added a second one.
Can I connect multiple rain barrels together?
Yes, and it’s a common upgrade once the first barrel proves useful. Drill a linking hole a few inches from the bottom of each barrel, connect them with a short length of tubing and a bulkhead fitting on each side, and the barrels will fill and drain evenly since they’re all working off the same water level, the same way connected fish tanks equalize.
Do I need a hole saw, or can I cut the holes another way?
A hole saw bit on a regular power drill is by far the cleanest method and the one this tutorial assumes, since it produces a round, even hole that matches standard bulkhead fittings. In a pinch, a spade bit can rough out a smaller starter hole that you then widen with a utility knife, but expect a rougher edge that needs extra caulk to seal well.
Does this work with a metal roof?
Yes, metal roofs actually shed water faster and cleaner than asphalt shingles, with less grit and fewer granules washing into the barrel over time. The build process is identical since you’re tapping into the downspout rather than the roof material itself; the only difference is that metal roof runoff tends to fill a barrel a little quicker during a storm.
Writes hands-on home and DIY content, with a background in furniture building and a habit of actually measuring things before recommending them.
